
Last Updated: October 23, 2026
Quick Summary
To arrange flowers like professional florists, start by preparing stems with fresh cuts at 45-degree angles and removing lower leaves, then build your arrangement in layers using the 3 5 8 rule with greenery foundation, focal flowers, and secondary blooms. Apply the 1/3 vase rule for balanced proportions, distribute color and texture throughout, and maintain freshness by changing water every 2-3 days and trimming stems regularly.
- Use the 3 5 8 rule in flower arranging, placing odd numbers of stems (3, 5, or 8) for natural balance and visual harmony.
- Apply the 1/3 vase rule: your finished arrangement should reach approximately one-third the height of your vase plus the vase height.
- Strip all leaves below the waterline before arranging to prevent bacterial growth and contamination that shortens vase life.
- Change water every 2-3 days and trim stems by 1 inch every 3-4 days to maintain water absorption and extend freshness.
- Distribute color, texture, and focal flowers throughout the arrangement rather than clustering them together for professional visual flow.
Table of Contents
- How to Arrange Flowers Like Professional Florists: The Essentials
- How to Prepare Flowers for Arranging
- Flower Arrangement Tools and Supplies You'll Need
- Vessel Preparation and the 1/3 Vase Rule for Flowers
- Building Your Arrangement: Greenery, Focal Flowers, and the 3 5 8 Rule in Flower Arranging
- Color, Texture, and Balance: Design Principles That Matter
- Extending Freshness: Conditioning and Care After Arranging
- Common Arrangement Mistakes and How to Fix Them
- Frequently Asked Questions
How to Arrange Flowers Like Professional Florists: The Essentials
Learning how to arrange flowers like professional florists transforms a simple bunch into a stunning focal point for any room.
The difference between a hastily thrown-together bouquet and a polished arrangement comes down to structure, balance, and intention. When you arrange flowers like professional florists do, you're applying design rules that create visual harmony. These rules work whether you're using grocery store blooms or premium wholesale stems.
This guide walks you through the exact process florists use, from vessel prep to the final touches that make an arrangement last. You'll learn the proportions, the mechanics, and the small details that separate amateur from professional results.
How to Prepare Flowers for Arranging
Fresh flowers start their life in your hands the moment they arrive. Preparation determines whether your arrangement holds up for days or wilts by tomorrow.
Remove the floral packaging carefully. Peel away the protective paper and any rubber bands or ties.
Rehydrate your flowers immediately. Place them in clean, room-temperature water for at least two hours before arranging.
Strip the lower leaves. Remove any foliage that would sit below the waterline in your vase.
Trim the stems at a 45-degree angle using sharp scissors or a floral knife. A fresh, angled cut exposes more stem surface for water absorption.
Flower Arrangement Tools and Supplies You'll Need
Professional florists rely on specific tools that make arranging faster and more precise.
Sharp scissors or floral knife: Dull tools crush stems instead of cutting them cleanly.
Floral tape: Use this to secure foam to your vase or to bundle stems together.
A clean vase or vessel: Glass, ceramic, or metal all work.
Floral preservative (optional): Commercial flower food extends vase life by providing nutrients and lowering pH. Homemade alternatives work too.
Greenery and filler flowers: These form the foundation and fill gaps.
Most arrangements don't require foam, especially if you're working with a narrow-necked vase.
Vessel Preparation and the 1/3 Vase Rule for Flowers
The vase you choose shapes everything that follows. Clean it thoroughly with hot water and a brush to remove any bacteria or residue. Bacteria shorten flower life dramatically.
Fill your vase with fresh, lukewarm water. Lukewarm water is absorbed faster than cold water. Add floral preservative if you're using it.
Now apply the 1/3 vase rule for flowers: your finished arrangement should be roughly one-third the height of your vase. This creates balanced proportions and ensures the vase supports the arrangement without looking top-heavy.
For example, if your vase is 12 inches tall, your arrangement should reach approximately 16 inches high (one-third of 12 inches plus the vase height). This isn't a rigid rule, it's a starting point.
The vase itself is part of your design. A clear glass vase shows off stems and water, so keep them clean. Opaque vessels hide mechanics but limit what you can see. Choose based on whether you want stems to be visible or hidden.
Building Your Arrangement: Greenery, Focal Flowers, and the 3 5 8 Rule in Flower Arranging
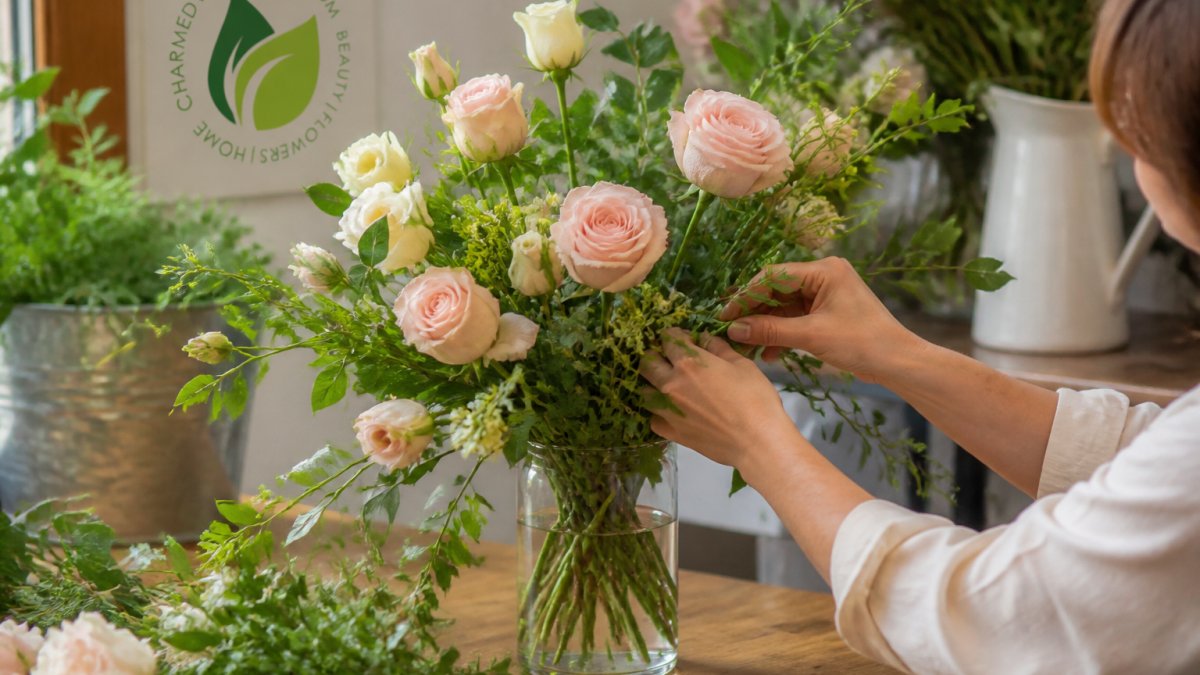
This is where professional technique becomes visible. Professional florists build arrangements in layers, starting with structure and ending with detail. The 3 5 8 rule in flower arranging is your roadmap.
Step 1: Establish Your Greenery Foundation
Start with greenery. This creates the outline and structure of your arrangement before you add a single flower.
Cut greenery stems to varying heights, some reaching the full height of your design, others shorter. This creates depth and prevents a flat, one-dimensional look. Arrange greenery to establish the overall shape you want: tall and vertical, low and spreading, or asymmetrical.
Use the 3 5 8 rule in flower arranging as your guide for placement. This rule suggests using odd numbers of stems, 3, 5, or 8 depending on your arrangement size. Odd numbers feel more natural and balanced than even numbers. For a medium arrangement, use 5 stems of greenery as your foundation.
Distribute greenery around the vase, not just in the front. You're creating a three-dimensional structure, not a flat wall. Stems should angle outward and downward as well as upward.
Step 2: Add Focal Flowers
Focal flowers are your stars. These are typically your largest blooms or most eye-catching flowers. Roses, peonies, sunflowers, and dahlias work beautifully as focal flowers.
Place your first focal flower slightly off-center and toward the middle-back of the arrangement. This becomes your anchor point. Add 2-4 more focal flowers around it, varying their heights slightly. Use the 3 5 8 rule here too, use 3, 5, or 7 focal flowers depending on arrangement size.
Each focal flower should be visible and not hidden behind greenery. They're the statement pieces. Space them so they don't touch each other, air between blooms creates visual interest.
Step 3: Fill with Secondary and Filler Flowers
Secondary flowers are smaller blooms that support your focal flowers without competing for attention. These might be spray roses, hypericum berries, or lisianthus. They bridge the gap between focal flowers and create continuity.
Place secondary flowers in clusters of 3 or 5, weaving them through the arrangement. They fill space and add texture while keeping focus on your focal flowers.
Filler flowers are delicate, airy blooms like baby's breath, waxflower, or statice. Use them sparingly. Too much filler makes an arrangement look cheap and cluttered.
Step back frequently and look at your arrangement from all angles. Rotate it and check for gaps. Fill obvious holes with greenery or secondary flowers.
Color, Texture, and Balance: Design Principles That Matter
Professional arrangements follow color principles that make them feel intentional rather than random.
Start with a color foundation. Choose 2-3 main colors and build around them. A monochromatic arrangement (all one color family) feels sophisticated.
Distribute color throughout the arrangement. Don't put all red flowers on one side and all white on the other.
Texture adds depth and prevents monotony. Mix smooth petals with spiky foliage. Combine delicate filler with structured focal blooms.
Balance can be symmetrical (mirror image on both sides) or asymmetrical (different but equally weighted). Symmetrical arrangements feel formal and structured.
Test balance by stepping back. Does the arrangement feel stable visually, or does it lean?
Extending Freshness: Conditioning and Care After Arranging
Your arrangement's lifespan depends on care after it leaves your hands. Fresh water is non-negotiable.
Change the water every 2-3 days. Empty the vase completely, rinse it, and refill with fresh, lukewarm water. If you're using floral preservative, add it again with fresh water. Discover DIY homemade flower food recipes that actually work as alternatives to commercial products.
Trim stems by about 1 inch every 3-4 days. Learn how to extend vase life of flowers with specific techniques for conditioning and ongoing care. A fresh cut keeps water uptake strong. This single step extends vase life dramatically.
Remove flowers as they fade. A single dying bloom releases ethylene gas, which speeds up aging in nearby flowers.
Keep arrangements away from direct sunlight, heat sources, and ripening fruit. Sunlight fades colors and dries stems. Heat accelerates wilting. Ripening fruit releases ethylene, which ages flowers faster.
For arrangements using floral foam, monitor water levels daily. Foam dries out quickly. If foam dries completely, flowers can't absorb water and will wilt rapidly.
Customers who commit to these simple steps report arrangements lasting longer. The difference isn't the flowers, it's the care.
Common Arrangement Mistakes and How to Fix Them
Even experienced arrangers make predictable mistakes. Knowing these saves you frustration.
Mistake: Crowding stems together. This blocks water flow and makes the arrangement look dense and amateurish.
Mistake: Using all the same stem height. This creates a flat, one-dimensional look.
Mistake: Forgetting to remove lower leaves. Submerged leaves decay and contaminate water, killing flowers faster.
Mistake: Using dull cutting tools. Crushed stems can't absorb water.
Mistake: Ignoring water quality. Bacteria and algae grow in dirty water.
Mistake: Placing arrangements in wrong locations. Direct sun, heat, and ripening fruit all shorten vase life.
Mistake: Not using odd numbers. Even numbers feel stiff and unnatural.
According to North Carolina State University researchers, consumers highly value arrangements with roses and care less for chrysanthemums.
Arranging flowers like professional florists is a learnable skill that improves with practice. See these techniques applied in practice with our guide on how to arrange garden flowers for rustic wedding centerpieces.
| Technique | Purpose | Key Rule |
|---|---|---|
| Greenery foundation | Creates structure and outline | Use odd numbers (3, 5, 8) |
| Focal flower placement | Establishes focal points | Space 2-4 inches apart |
| Secondary flowers | Bridges gaps and adds texture | Place in clusters of 3-5 |
| Color distribution | Creates visual harmony | Weave colors throughout |
| Stem trimming | Maintains water absorption | Cut 1 inch every 3-4 days |
| Water changes | Prevents bacterial growth | Every 2-3 days minimum |
Frequently Asked Questions
What's the 1/3 vase rule for flowers?
The 1/3 vase rule states that your flower stems should be about one-third the height of your vase. This creates balanced proportions and ensures stems have enough water while blooms have visual presence above the rim. If your vase is 12 inches tall, your stems should be roughly 4 inches. This rule prevents top-heavy arrangements and keeps flowers hydrated without overcrowding the vessel.
How do professional florists prepare flowers before arranging them?
Florists remove all packaging, strip leaves below the waterline, and recut stems at a 45-degree angle under running water within seconds of arranging. They condition flowers by placing them in clean, cool water for several hours before design work. This hydration process allows stems to absorb water fully, extending vase life. Fresh cuts remove air pockets that block water uptake, while removing lower leaves prevents bacterial growth that clouds water and shortens bloom time.
Should I put sugar in water for cut flowers?
Sugar provides food for cut flowers and can extend vase life by 3-5 days when combined with a biocide to prevent bacterial growth. However, plain water changed every 2-3 days works well for most home arrangements. If using sugar, dissolve 1 tablespoon per quart of water. Commercial flower food packets contain both sugar and biocide, making them more effective than sugar alone. For organic or botanical-focused arrangements, fresh water changes are a reliable alternative.
How do you keep a flower arrangement fresh for longer?
Change the water every 2-3 days, recut stems by 1 inch each time, and remove any wilted petals or leaves. Keep arrangements away from direct sunlight, heat sources, and ripening fruit, which releases ethylene gas that accelerates wilting. Use cool water (not cold) and ensure the vase is scrupulously clean before refilling. Conditioning flowers before arranging and using flower food also extend freshness. Most quality arrangements last 7-10 days with consistent care.
